Grab My Blinkie

Fave Forums


I CT For


Stores I Love


Blogs I Love


Popular Posts
-
 Beautiful and wintery Scrap Kit by PinkParadox! 145 elements,10 frames and 30 papers Beautiful Kit can be bought here: http://pi...
 -
 Beautiful colorful and fun Scrapkit Dees'Sign kit is available here: http://deessigndepot.com/store Beautiful 95 elements, 1...
 -
 Beautiful kit by Kissing Kate with beautiful elemnts and colors! 98 elements,10 papers and 4 frames You can buy it here: http:...
 -
 Beautiful scrapkit with dark colors and stunning elements! Perfect for the Halloween season! 76 elements 4 frames 9 papers and w...
 -
 Beautiful and wintery Scrap Kit by PinkParadox! 145 elements,10 frames and 30 papers Beautiful Kit can be bought here: http://...
 -
 Beautiful scrapkit with dark colors and stunning elements! Perfect for the Halloween season! 77 elements 5 frames 10 papers and ...
 -
 Beautiful scrapkit with dark colors and stunning elements! Perfect for the Halloween season! 70 elements 6 frames 10 papers and wo...
 -
 Beautiful colorful Christmas Scrapkit Amazing elements and papers as word art and Christmas animations! Dees'Sign kit is av...
 -
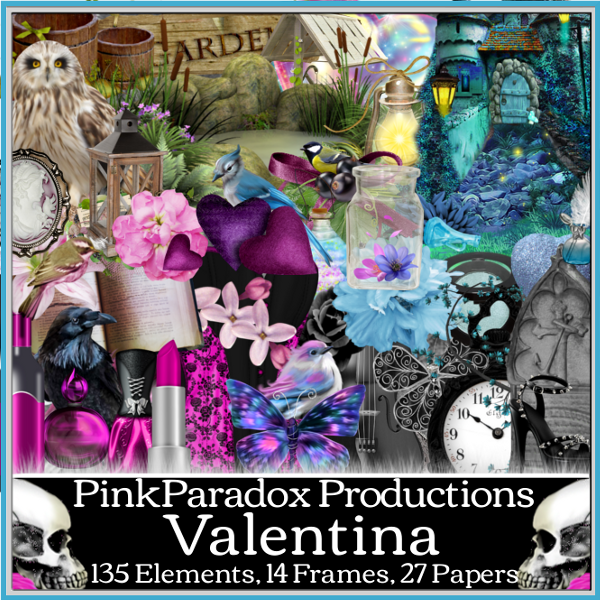
 PTU Kit By Irish princess design called Victorian Valentine Can be bought here: Smiley Creations http://smileycreations.co.uk/ ...
 -
 Beautiful and wintery Scrap Kit by PinkParadox! 95 elements,10 frames and 25 papers Beautiful Kit can be bought here: http://pin...
Friday, January 31, 2014

Wednesday, January 29, 2014


Beautiful Jill by Verymany!

Adorable Little angel by Verymany


Kitty Angel - Beautiful tube by Ninaste
Can be bought here:
http://beehivestudio-store.com/store/
Tutorial can be found here:
http://sonjassazzyworld.blogspot.ca/
Tuesday, January 28, 2014

Tutorial was written for those that have a working knowledge of PSP
Any resemblance to any other tut is purely coincidental.
Please do not copy it in anyway, do not resize it or claim it’s as your own.
Material:
Beautiful tubes by Derzi - Sweet Lil Cupid
Can be bought here:
http://beehivestudio-store.com/store/
Scrap Kit by Theresa, My Pink valentine
www.creativemisfitscreations.blogspot.com/
Tutorial:
Open new image 650x650 white background
Open frame and resize by 60%
Paste paper 3 under the frame
Select inside the frame with magic wand
Selections modify expand by 5
Select paper layer invert delete
In from of the frame place ribbin 3,resize by 70%
In the right corner add element present
Duplicate resize by 80 and position behind it
Add element bling
Place the tube in the middle
Now go to all the way back
I added element rose cluster
Position more to the left add shadow
duplicate and mirror
I did the same with the element rose heart
Add name and copyright
Thursday, January 23, 2014

Any resemblance to any other tut is purely coincidental.
Please do not copy it in anyway, do not resize it or claim it’s as your own.
Material:
Beautiful tubes by Derzi - Moosie and Pookie Love
Can be bought here:
http://beehivestudio-store.com/store/
Scrap Kit by Bibi Called Hard Love
Tutorial:
Open new image 650x650 white background
Open white and blue frame
Resize by 50%
Put them side by side so they intercept in the middle,add shadow
Paste the paper 7 and colorize
Adjust,hue and saturation,H140 S167
Paste the tubes in the midlle of it
Resize and position to your liking
On the left side I added BC Hard Love elements (13)
Resize by 50 and add shadow
In the middle I added the wordart and added shadow
Around that i positioned the flower BC Hard Love elements (41)
I copied the lement few times and placed all around
As a last layer I added BC Hard Love elements (25)
Duplicate and mirror
Add mask of your choice
Go to the top layer and add sparkles BC Hard Love elements (63)
Add name and copyright
Hope you enjoyed!If you have questions dont hesitate to ask!
Tuesday, January 21, 2014

Any resemblance to any other tut is purely coincidental.
Please do not copy it in anyway, do not resize it or claim it’s as your own.
Material:
Beautiful tubes by Derzi - Love Bunny
Can be bought here:
http://beehivestudio-store.com/store/
Cluster Frame bought at DigiScrap Store by Saskia
Tutorial:
Open new image 650x650 white background
Paste the frame and resize by 30% add shadow
New layer and color with green #399c63
Select inside the frame with magic wand and modify expand by 10
Invert delete
Effect texture wall
Add tube and mask to your liking.
Add name and copyright
Hope you enjoyed!If you have questions don't hesitate to ask!
Monday, January 20, 2014

This is gorgeous kit by Abstract creations!
Amazing colors and elements.Kit is match to Enamorte Tube.
I used also Enamorte tube,Stardust
Scrap kit can be bought at CDO!

And some Freebies Extra from me


Friday, January 17, 2014

Tutorial was written for those that have a working knowledge of PSP
Any resemblance to any other tut is purely coincidental.
Please do not copy it in anyway, do not resize it or claim it’s as your own.
Material:
Beautiful tubes by Derzi - AndroDreams Collection
Can be bought here:
http://beehivestudio-store.com/store/
Scrap Kit by Russian Dutch Heart Design
http://smiekeltje.blogspot.ca/
Tutorial:
Open new image 650x650 white background
I started with frame 1
I resized by 60% and added shadow
Under that I pasted paper 3
Select inside the frame with magic wand
Selections modify and expand by 7
Select paper layer, selections invert and delete
Add the tubes...
Fist I added prom queen,add shadow position to the right
Add prom ling behind the frame
Position so just his face is visible, erase the excess
Blend mode for the face,luminance (L)
Behind all that I added element 1, flowers
I duplicated few time and them mirror it
Position to you liking
I like when flowers are visible behind the frame
Add mask of your choice
Now on to elements
I added heart element, element 17
And in front I added some sparkles
I also added the word art love
Duplicate resize by 30% and position above the first one
Add name and copyright
Hope you enjoyed!If you have questions don't hesitate to ask!
Wednesday, January 15, 2014

Tutorial was written for those that have a working knowledge of PSP
Any resemblance to any other tut is purely coincidental.
Please do not copy it in anyway, do not resize it or claim it’s as your own.
Material:
Beautiful tube called Bookworm by Ninaste
Can be bought here:
http://beehivestudio-store.com/store/
Scrap Kit by Jady Day Studio
ww.jadydaystudio.com
Font:Xiomara
Tutorial:
I started with frame1
Paste it and then resize
About resizing,I resed all element at least 40%
They have big resolution and size
I used paper solid4 and resize it
Select the frame layer use magic wand to select inside
Go to selections modify expand by 16
Selections invert and delete
Open the tube,duplicate
Position original size behind the frame and use blend mode overlay
Erase the excess of the tube
The other duplicate resize by at least 30% so it can be visible in whole
Position to the left
Now the elements
I started with backpack2
Resize and position to the left and duplicate,mirror
Then I used book1 and position in front of it
Duplicate the book and position on the top of the previous one
It looks like stocked books
Duplicate the bottom book once more and mirror it
I added the glue..also twice
I added the word art in the middle
Behind that put the ruler also resized at least by 40%
I also added the pencils and flowers behind the frame and paper
Duplicated few times and position all over so the tag looks full
Add name and copyright
Hope you enjoyed!If you have questions dont hesitate to ask!
Tuesday, January 14, 2014

Tutorial was written for those that have a working knowledge of PSP
Any resemblance to any other tut is purely coincidental.
Please do not copy it in anyway, do not resize it or claim it’s as your own.
Material:
Beautiful tube called Sarah by Spazz
Can be bought here:
http://spazzdart.com/
Template 470 from Milie's Psp Madness
http://milliespspmadness.blogspot.ca/
Scrap Kit by Chichi Design called Fantasia FTU
http://chichidesignz2.blogspot.ca/
Font:Snappy dna
Tutorial:
Open template,duplicate and close the original.
I did all the layers and I used the different papers
Select with magic want box 1 layer and selection,float defloat
Paste paper 6 (Paper6_CD_Fantasia)
Selections invert,delete
Do this for all the layer and use the paper you like.
I used papers 6,4 and 5
I really is personal choice and colors you wanna use.
Open your tube and position,add shadow
Duplicate tube 2 time and position that faces are over layers we
just did in this case layer 5 and 6
Erase the excess and set blend mode to soft light
On second duplicate mirror the image and use soft light also
Now onto elements
We will start with elements that are just beside the tubes
On the left...I used elements Pillows1_CD_Fantasia and Bridge_CD_Fantasia
Place the bridge behind the pillows
On the right I used elements Candle_CD_Fantasia and Book_CD_Fantasia
Place the book,resized by 60% and behind it candle resized by 40%
Also behind the tube I placed Branch_CD_Fantasia
Resize by 90% and place close to the tube,just behind her
Duplicate and mirror
Also behind layers 5 and 6 place FlowerBasket_CD_Fantasia
Add shadow...duplicate so its visible on both sides
Also add element FlowerFrame_CD_Fantasia behind those two layers
At the end I added sparkle element Sparkles1_CD_Fantasia
Add name and copyright
Hope you enjoyed!If you have questions don't hesitate to ask!
Monday, January 13, 2014
:

Tutorial was written for those that have a working knowledge of PSP
Any resemblance to any other tut is purely coincidental.
Please do not copy it in anyway, do not resize it or claim it’s as your own.
Any resemblance to any other tut is purely coincidental.
Please do not copy it in anyway, do not resize it or claim it’s as your own.
Material
PTU Kit By HorsePasture’s Design called Promise
http://horseplayspasturedesigns.blogspot.ca/
Kit can be bought at http://scrapsfromtheheart.net/
OR http://www.heartbeatzcreationz.com/
Kit can be bought at http://scrapsfromtheheart.net/
OR http://www.heartbeatzcreationz.com/
PTU tube from Alex Prihodko avaible at PFD
Tutorial:
Open new image 650x650 white background
Open frame 2, hpd_Promise_El12, resize by 90%
Open paper 3, hpd_Promise_P3, and paste behind the frame
Resize by 50% and erase the excess
Open new image 650x650 white background
Open frame 2, hpd_Promise_El12, resize by 90%
Open paper 3, hpd_Promise_P3, and paste behind the frame
Resize by 50% and erase the excess
Open the tube
I choose beautiful one by A.Prihodko which can be bought at PFD
Resize by 60% and position in the middle.
I duplicated the tube 3 time and positioned just the faces behind the frame
Erase the excess of the tube
And change blend mode to luminance
Go to the bottom oh the layer,just one in front of the white background
Paste element, hpd_Promise_El69 and resize by 90%
Position element to the right so just little leaves are visible
Duplicate and mirror, add shadow
Now go to the top in front of the frame
Add element bow, hpd_Promise_El34, position to the right, duplicate and mirror
Add element hpd_Promise_El73,duplicate 3 time and position in front of the bows
Add element flask, hpd_Promise_El77, mirror and duplicate
Just behind the tube add flowers hpd_Promise_El23 and duplicate
Add shadow and mirror it
I also added element hpd_Promise_El71
I added the word art Love just behind the tube
Duplicate and position side by side, add shadow
At the end I added flower swirl hpd_Promise_El45
Also duplicated and mirror
I love when tags are full so to say so I do I lot of duplicating.
It is all personal choice
Also duplicated and mirror
I love when tags are full so to say so I do I lot of duplicating.
It is all personal choice
Hope you enjoyed and if you have questions don’t hesitate to
ask.
Friday, January 10, 2014

Beautiful new tube by Lady Mishka NEW!
Can be bought here:
www.picsfordesign.com
Tuesday, January 7, 2014

I just love this beautiful scrap kit by Abstract creations!
Amazing colors and elements.Kit is match to Enamorte Tube.
I used also Enamorte tube,Queen of the hearts
Scrap kit can be bought at CDO!


CT DE PINKPARADOX PRODUCTIONS
PTU Scrap Kit "IMMORTAL LOVE" by PinkParadox Productions
The kit is available for sale at Pink Paradox store!
http://pinkparadoxproductions.com/
Dark, mysterious & sexy! Gothic girls need love too!
Nice purple black combination,kit for every use!

SOME EXTRAS:


Monday, January 6, 2014

Tutorial was written for those that have a working knowledge of PSP
Any resemblance to any other tut is purely coincidental.
Please do not copy it in anyway, do not resize it or claim it’s as your own.
Material:
Scrap Kit By Horse's pasture design - My Life My Moments
http://horseplayspasturedesigns.blogspot.ca/
Kit can be bought at http://scrapsfromtheheart.net/
OR http://www.heartbeatzcreationz.com/
Template 469 from Milie's Psp Madness
Plug in - Eye candy 400
Tube by Alex Prihodko
Font:Snappy dna
Tutorial:
Open template,duplicate and close the original.
First I did layers 1, 2 and 3
Select with magic want box 1 layer and selection,float defloat
Paste paper hpd_MLMM_P5
Selections invert,delete
Do this for all the layer and use the paper you like.
IT really is personal choice and colors you wanna use.
Open your tube and position,add shadow
Duplicate tube 2 time and position that faces are over layers we
just did
Erase the excess and set blend mode to screen
On second duplicate mirror the image and uuse screen also
Opacity 50%
Behind the layer paste frame hpd_MLMM_El21
Make just top visible,erase the rest
Under the tube i positioned bow element hpd_MLMM_El24 and flower hpd_MLMM_El10
Duplicate the flower and mirror it so it comes under the tube again
Under that all i positioned other bow hpd_MLMM_El43
Duplicate and mirror
And again we go under the template layer 7
I used the leaves element hpd_MLMM_El52
Resize by 60% and position few time
Under that I position the flower hpd_MLMM_El10 few time
I duplicate 5 time and positioned that just petals are visible
All the way at the back i put element hpd_MLMM_El67
duplicated and mirror it
At the end I added the word art from the kit!
Add shadow and plugin Eye candy 400 gradient glow
(3,0,100,white)
Add name and copyright
Hope you enjoyed!If you have questions don't hesitate to ask!
Friday, January 3, 2014

Beautiful kit by Jackie's Jewel called Winterberry.
http://www.mysticalscraps.com/
Winterberry is a gorgeous kit full of neutral colors for all of your winter needs.
It's got 64 elements and 13 papers.
Tutorial was written for those that have a working knowledge
of PSP
Any resemblance to any other tut is purely coincidental.
Please do not copy it in anyway, do not resize it or claim it’s as your own.
Any resemblance to any other tut is purely coincidental.
Please do not copy it in anyway, do not resize it or claim it’s as your own.
Material:
PTU Kit Inspired By: Winterberry By Jackie’s Jewels
http://www.mysticalscraps.com/index.php?main_page=index&cPath=7_167
http://www.mysticalscraps.com/index.php?main_page=index&cPath=7_167
PTU tube from Very Many
Tutorial:
Open new image 650x650 white background
Open new image 650x650 white background
Open frame 5 and resize by 60%
Open paper 9 resize by 60% and paste behind the frame.
Select inside (magic wand) the frame, selections, modify expand by 3
Selections invert and delete
Open your tube and duplicate
First one resize and position to your liking
Second one place in front of the paper layer so just her face is visible
on that layer put a blend mode luminance
Erase the excess
Open element feather and position to the right in front of the frame.
Duplicate and mirror add shadow
I added few elements in front of the feather:
SnowyBranch1, Ribbon1, Landed snowflake
SnowyBranch1, Ribbon1, Landed snowflake
Snowflake I duplicated 3 times and put on the bottom so t
looks like tube is sitting on them
On the left behind the tube I added elements:
Coffee mittens and bird (all resized by 60% at least)
Coffee mittens and bird (all resized by 60% at least)
On the right I put Hanging Heart
Go to the bottom, before the white background I put Snowflake2
Resize by 60% duplicate 3 time and position so just top is visible behind all.
At the end I added word art from the kit!
First is the Winter and then over that another one: winter day
Hope you enjoyed and if you have questions don’t hesitate to ask.


CT DE PINKPARADOX PRODUCTIONS
PTU Scrap Kit "PARISIAN PURPLE" by PinkParadox Productions
The kit is available for sale at Pink Paradox store!
http://pinkparadoxproductions.com/
Chic, Couture, Elegant & Beautiful!
Stunning kit with mix of purple grey and white
Subscribe to:
Posts
(Atom)
My Blog List
-
2024 March Clusters - Creative Misfits came together and made some beautiful clusters for you all! Thanks so much everyone for participating they are all amazing! These c...

-
-
-
Countdown to Christmas: Dec 22 - Dec 24 - With Christmas knocking on our doors - I am giving you my Custom Design for only $12.50! *From December 22 - December 24 treat yourself with 50% off on my...

-
WINTER BLISS - DOWNLOAD '4SHARED' HERE DOWNLOAD 'MEDIAFIRE' HERE [image: post signature]


